Mostrando entradas con la etiqueta desayuno. Mostrar todas las entradas

12 agosto 2026

Receta express 🍓🥤 Batido de proteínas con fresas y melocotón 🍑


Hay una cosa que nunca debería ocurrir después de entrenar, que es llegar a casa con un hambre terrible y descubrir que no tienes absolutamente nada preparado.

Bueno, sí puede ocurrir y, de hecho, ocurre bastante a menudo.

Precisamente para evitar que esto pase, tengo algunas recetas express que se preparan prácticamente antes de que te dé tiempo a pensar qué vas a comer.

Este batido de fresas y melocotón es una de ellas.

Necesitas cuatro ingredientes, sí solo cuatro, una batidora y un par de minutos.

Si te soy sincera, es una receta que preparo completamente a ojo. Un puñado de esto, un chorrito de aquello, triturar… y listo.

Aunque tranquila, que esta vez lo he medido todo para compartirte las cantidades exactas.

La combinación es sencillísima: fresas (si están congeladas, mucho mejor porque conseguirás un batido más fresco y cremoso), yogur, zumo de melocotón y una cucharada de proteína en polvo.

Y aquí está precisamente el pequeño detalle que hace que este batido sea algo más que fruta triturada.

La proteína.

Cada vez intento prestar más atención a incluir una buena cantidad de proteína en mis comidas y, especialmente después de entrenar. Entre el yogur y la proteína en polvo consigues un batido mucho más completo y saciante sin complicar la receta.

Las fresas y melocotón son una combinación que funciona de maravilla, es una mezcla fresca, ligeramente dulce y con ese punto ácido de las fresas que hace que no resulte nada pesado.

Y ahora, en verano, todavía tiene más sentido.

Yo suelo tener fresas congeladas porque, aparte de que me encantan, me salvan de más de un apuro. Llegas de entrenar acalorada, abres el congelador, lo echas todo en la batidora y, dos minutos después, tienes algo frío y delicioso esperando.

Sin pesar, sin cocinar y prácticamente sin recoger.

Si quieres prepararlo exactamente como yo, te dejo las cantidades más abajo, aunque tienes permiso absoluto para hacerlo a ojo. De hecho, posiblemente la segunda vez ya ni las mires.

Es súper fácil de preparar, no tiene ningún misterio pero si quieres ver cómo lo preparo paso a paso, te dejo el vídeo AQUÍ

Y ahora cuéntame… ¿tú también sigues entrenando en verano o con las vacaciones cambian por completo tus rutinas y hábitos?

Te leo 🍓🍑


Batido de fresas y melocotón con proteína

Ingredientes

  • Un puñado de fresas (si son congeladas, mejor)
  • ¼ de taza de yogur
  • 150 ml de zumo de melocotón (a ser posible ecológico y sin azúcares añadidos)
  • 1 cucharada de proteína en polvo


Elaboración

  1. Tritura bien todos los ingredientes y disfruta de un batido rico en vitaminas, buenísimo y con aporte extra de proteína gracias al yogur y la proteína.

English version

There’s one thing that should never happen after a workout: getting home absolutely starving and realising you have nothing ready to eat.

Well… it can happen. And, actually, it happens quite often.

That’s exactly why I keep a few express recipes up my sleeve, the kind you can make almost before you’ve even had time to decide what you’re going to eat.

This strawberry and peach smoothie is one of them.

You need four ingredients — yes, just four — a blender and a couple of minutes.

If I’m being completely honest, this is one of those recipes I usually make entirely by eye. A handful of this, a splash of that, blend… and done.

But don’t worry, this time I actually measured everything so I could give you the exact quantities.

The combination couldn’t be simpler: strawberries (frozen are even better because they make the smoothie colder and creamier), yogurt, peach juice and a spoonful of protein powder.

And that’s precisely the little detail that turns this smoothie into something more than just blended fruit.

The protein.

I’m paying more and more attention to including a good amount of protein in my meals, especially after training. Between the yogurt and the protein powder, you end up with a much more complete and satisfying smoothie without making the recipe any more complicated.

Strawberries and peach are such a good combination: fresh, lightly sweet and with that little tang from the strawberries that keeps the whole thing from feeling heavy.

And now that it’s summer, it makes even more sense.

I usually keep frozen strawberries at home because, apart from loving them, they get me out of trouble more often than I can count. You come home hot after training, open the freezer, throw everything into the blender and two minutes later you’ve got something cold and delicious waiting for you.

No weighing, no cooking and almost nothing to clean up.

If you want to make it exactly as I do, I’ve left the quantities below, although you have my full permission to make it by eye. In fact, chances are you won’t even look at them the second time.

It’s incredibly easy to make and there’s really no mystery to it, but if you’d like to see exactly how I prepare it step by step, you can watch the video HERE.

And now tell me… do you keep training during the summer too, or do your routines and habits change completely once the holidays start?

I’m reading you 🍓🍑


Strawberry and peach protein smoothie

Ingredients

  • A handful of strawberries (frozen are even better)
  • ¼ cup yogurt
  • 150 ml peach juice (preferably organic and with no added sugar)
  • 1 tablespoon protein powder


Method

  1. Blend all the ingredients thoroughly and enjoy a delicious smoothie packed with vitamins and an extra boost of protein from the yogurt and protein powder.

24 junio 2026

Receta de gofres para los domingos: crujientes por fuera, esponjosos por dentro y con ingredientes buenos


En casa tenemos algunos desayunos especiales que reservamos solo para los fines de semana o los festivos. Sencillamente porque no saben igual cuando los comes con prisas, mientras miras el reloj o pensando en todo lo que tienes que hacer después. Hay desayunos que merecen que estemos sentados a la mesa para saborearlos despacio y disfrutarlos en compañía.

Y estos gofres son una de ellas.

Pero no unos gofres cualquiera, que ya me conoces.

Esta receta nace de una de esas cosas que casi se ha convertido en un ritual en mi cocina y que es darle vueltas una y otra vez a una receta hasta encontrar una versión que no solo esté hecha con ingredientes reales y sencillos, sino que ¡sea también un diez en sabor!

Con avena, trigo sarraceno, almendra, plátano maduro y el dulzor justo para que sigan sabiendo a desayuno especial sin convertirse en un festival de azúcar.

Lo mejor es la textura.

Crujientes por fuera, esponjosos por dentro y con ese aroma a vainilla y canela que hace que la cocina huela a domingo incluso antes de que te hayas servido el café.

Puedes servirlos con nutella vegana casera (tienes la receta AQUÍ), yogur, mantequilla de frutos secos, fruta fresca o los toppings que más te gusten. O con la combinación de todo lo anterior.

Algunos domingos nuestra mesa termina pareciéndose más a un pequeño buffet de toppings que a un desayuno normal, y cada uno acaba montando sus gofres favoritos. Y, siendo sincera, creo que esa es una de las mejores partes.

¿Eres de gofres o de tortitas? Yo sigo sin tenerlo claro 😏🥞🧇


Gofres saludables de avena y trigo sarraceno

Ingredientes

  • 100g de copos de avena
  • 120g de harina de trigo sarraceno
  • 50g de harina de almendras o trigo integral
  • 325ml de bebida de avena
  • 1½ cucharaditas de levadura química
  • ½ cucharadita de canela
  • ½ cucharadita de extracto de vainilla
  • 30g de aceite de coco derretido
  • 1 plátano maduro
  • Una pizca de sal marina


Elaboración

  1. Tritura en la batidora todos los ingredientes excepto las harinas y los copos de avena.
  2. Añade las harinas y mezcla lo justo hasta integrar.
  3. Incorpora los copos de avena enteros (sin triturar) y deja reposar 10 minutos para que se hidraten.
  4. Calienta bien la gofrera por ambos lados.
  5. Vierte la masa rellenando bien los espacios y cocina a fuego medio durante 2-3 minutos.

English version

At home, we have a few special breakfasts that we save only for weekends or holidays. Simply because they don’t taste the same when you eat them in a rush, while watching the clock or thinking about everything you have to do afterwards. Some breakfasts deserve for us to sit down at the table, savour them slowly and enjoy them together.

And these waffles are one of them.

But not just any waffles, you know me by now.

This recipe was born from one of those things that has almost become a ritual in my kitchen: going over a recipe again and again until I find a version that is not only made with real, simple ingredients, but also a ten out of ten in flavour!

With oats, buckwheat, almond, ripe banana and just the right amount of sweetness so they still taste like a special breakfast without becoming a sugar festival.

The best part is the texture.

Crispy on the outside, fluffy on the inside, with that vanilla and cinnamon aroma that makes the kitchen smell like Sunday even before you’ve poured your coffee.

You can serve them with homemade vegan Nutella (you can find the recipe HERE), yogurt, nut butter, fresh fruit or whichever toppings you like best. Or with a combination of all of the above.

Some Sundays, our table ends up looking more like a little toppings buffet than a normal breakfast, and everyone ends up building their favourite waffles. And honestly, I think that’s one of the best parts.

Are you team waffles or team pancakes? I’m still not sure 😏🥞🧇


Healthy oat and buckwheat waffles

Ingredients

  • 100g rolled oats
  • 120g buckwheat flour
  • 50g almond flour or whole wheat flour
  • 325ml oat milk
  • 1½ teaspoons baking powder
  • ½ teaspoon ground cinnamon
  • ½ teaspoon vanilla extract
  • 30g melted coconut oil
  • 1 ripe banana
  • A pinch of sea salt


Method

  1. Blend all the ingredients except the flours and rolled oats until smooth.
  2. Add the flours and mix just until incorporated.
  3. Fold in the whole rolled oats (do not blend them) and let the batter rest for 10 minutes so the oats can hydrate.
  4. Preheat the waffle iron thoroughly on both sides.
  5. Pour in the batter, making sure it fills the mould properly, and cook over medium heat for 2–3 minutes.


27 mayo 2026

Receta express de Crepes de limón


¿Cuántas veces te has parado delante de la nevera abierta y has dicho: “No tengo nada”?

Y casi nunca es verdad.

Lo que suele ocurrir es más bien que no tenemos nada preparado, ni pensado. Nada que parezca, de entrada, un desayuno bonito o una merienda improvisada.

Pero entonces abres la despensa y encuentras un resto de harina en un tarro. Después, un huevo y un poco de leche en la nevera. Medio limón olvidado en la encimera.

Y, de repente, esa cocina que parecía no tener muchas posibilidades empieza a parecerse a un buen plan.

Estas crêpes de limón nacen de un momento así, de uno de esos días en los que la despensa está en mínimos, pero aún te apetece comer algo rico y con un pequeño giro que haga que no suene a lo de siempre.

Porque podrían ser unas crêpes más, con un poco de azúcar por encima.

Pero aquí el azúcar de coco y el chorro generoso de limón cambian la historia. Les dan frescor, contraste y ese punto ácido que recuerda a verano, a sobremesa larga y a vacaciones cerca, aunque todavía estés en casa.

Y lo mejor es que no necesitas casi nada: una masa sencilla, una sartén caliente y unos minutos en la cocina. El limón se encarga del resto.

Es una receta exprés, sí y también la prueba de que, a veces, no hace falta tener la cocina llena para preparar algo que esté bueno y te alegre el día.

Si prefieres ver el vídeo de cómo preparo la receta, te lo dejo AQUI

¿Te animas a probarlas la próxima vez que pienses que no tienes nada? Y también me encantará saber si tienes alguna receta que sea tu salvavidas cuando no hay un plan y apenas ingredientes en casa.


Crêpes de limón

Ingredientes

  • 60g de harina (la que quieras)
  • Una pizca de sal
  • 1 huevo ecológico
  • 4 cucharadas de leche (la que quieras)
  • 1 cucharada de aceite de oliva virgen extra
  • 1 cucharada de mantequilla
  • Azúcar de coco para espolvorear
  • Un chorro de limón


Elaboración

  1. En un bol, mezcla la harina con la pizca de sal. Añade el huevo, la leche y el aceite de oliva virgen extra, y bate bien hasta conseguir una masa fina, sin grumos y bastante ligera. Si ves que queda demasiado espesa, puedes añadir un poquito más de leche hasta que tenga una textura fluida.
  2. Calienta una sartén antiadherente a fuego medio y añade un poco de mantequilla. Cuando se haya derretido, vierte una pequeña cantidad de masa y mueve la sartén con suavidad para repartirla bien por toda la superficie. La idea es que quede una capa fina.
  3. Cocina la crêpe durante uno o dos minutos, hasta que los bordes empiecen a despegarse y la superficie se vea cuajada. Dale la vuelta con cuidado y cocina unos segundos más por el otro lado.
  4. Repite el proceso con el resto de la masa, añadiendo un poco más de mantequilla si lo necesitas.
  5. Sírvelas recién hechas, espolvoreadas con azúcar de coco y con un buen chorro de limón por encima. Ese contraste entre el dulzor suave del azúcar y la acidez del limón es lo que hace que una receta tan simple se vuelva especial.


English version

How many times have you stood in front of an open fridge and said: “I have nothing to eat”?

And it’s almost never true.

What usually happens is that we don’t have anything prepared or planned. Nothing that immediately looks like a beautiful breakfast or an improvised afternoon treat.

But then you open the pantry and find some leftover flour in a jar. Then an egg and a little milk in the fridge. Half a lemon forgotten on the counter.

And suddenly, that kitchen that seemed to have no possibilities starts looking like a pretty good plan.

These lemon crêpes were born from one of those moments, from one of those days when the pantry is almost empty but you still feel like eating something delicious with a little twist that makes it feel different.

Because they could just be another batch of crêpes with a little sugar on top.

But here, the coconut sugar and the generous squeeze of lemon completely change the story. They bring freshness, contrast and that citrusy touch that tastes like summer, long lunches and holidays nearby… even if you’re still at home.

And the best part is that you barely need anything: a simple batter, a hot pan and a few minutes in the kitchen. The lemon does the rest.

It’s a quick recipe, yes, but also proof that sometimes you don’t need a fully stocked kitchen to make something delicious that brightens your day.

If you’d rather watch the video of how I make them, I’ll leave it HERE.

Would you try them the next time you think you have nothing at home? And I’d also love to know if you have a recipe that becomes your lifesaver when there’s no plan and barely any ingredients in the kitchen.


Lemon Crêpes

Ingredients

  • 60g flour (any kind you like)
  • A pinch of salt
  • 1 organic egg
  • 4 tablespoons milk (any kind you like)
  • 1 tablespoon extra virgin olive oil
  • 1 tablespoon butter
  • Coconut sugar for sprinkling
  • A generous squeeze of lemon


Method

  1. In a bowl, mix the flour with the pinch of salt. Add the egg, milk and extra virgin olive oil, then whisk well until you get a smooth, lump-free and fairly light batter. If it feels too thick, add a little more milk until it reaches a pourable consistency.
  2. Heat a non-stick frying pan over medium heat and add a little butter. Once melted, pour in a small amount of batter and gently swirl the pan so it spreads evenly across the surface. The goal is to create a thin layer.
  3. Cook the crêpe for one or two minutes, until the edges begin to lift and the surface looks set. Carefully flip it over and cook for a few more seconds on the other side.
  4. Repeat the process with the remaining batter, adding a little more butter if needed.
  5. Serve them freshly made, sprinkled with coconut sugar and finished with a generous squeeze of lemon juice. That contrast between the gentle sweetness of the sugar and the acidity of the lemon is what turns such a simple recipe into something special.


13 mayo 2026

Bizcocho de chocolate


Seamos sinceras, hay recetas que pruebas una vez… y desaparecen.

Y luego están las otras. Las que llegan, a veces incluso por casualidad, sin hacer demasiado ruido y terminan formando parte de tu vida para siempre.

Este bizcocho de chocolate pertenece a ese segundo grupo.

Recuerdo perfectamente la primera vez que lo preparé. Pensé aquello de “bueno, vamos a ver qué tal”… y terminó pasando algo bastante habitual cuando hay chocolate de por medio en esta casa: desapareció antes de que llegara a enfriarse del todo... buena señal.

La receta original se la tomé prestada a @lasrecetasdemj aunque, a estas alturas, ya sabes que rara vez puedo evitar adaptar las cosas y que tengan mi propio estilo. Menos azúcar, ingredientes más interesantes nutricionalmente y ese equilibrio entre postre rico y postre que además te siente bien.

Porque sí, se puede hacer un bizcocho de chocolate increíblemente jugoso sin necesitar medio paquete de azúcar.

Gran parte del secreto de este bizcocho son los plátanos maduros. Aportan dulzor, humedad y esa textura tierna que hace que aguante perfecto varios días… si consigue sobrevivir tanto tiempo, claro.

Y luego está el chocolate. Ese chocolate que se funde ligeramente dentro del bizcocho mientras se hornea y crea pequeñas zonas casi cremosas que hacen que cada trozo sea distinto al anterior.

El resultado es intenso, húmedo, aromático y peligrosamente adictivo… empiezas cortando “un trocito pequeño”… y acabas volviendo a la cocina un rato después a por más ¿te suena?

Y ahora necesito saberlo ¿eres de las que espera pacientemente a que el bizcocho enfríe… o también te quemas los dedos intentando coger un trozo caliente? 😏


Bizcocho de chocolate

Ingredientes

  • 140g de harina de espelta integral
  • 60g de cacao puro en polvo
  • 1y1/2 chdta levadura química
  • 1/2 chdta de sal
  • 1/2 chdta de canela molida
  • 50g de azúcar de coco (MJ lo hace con 150g de azúcar blanco)
  • 3 plátanos maduros
  • 80g aceite oliva o coco (yo he usado de coco)
  • 1 huevo L
  • 1 chdta extracto vainilla
  • 180g chocolate negro mínimo 70%


Elaboración

  1. Precalentamos horno 180ºC y mezclamos harina, levadura, cacao, sal y canela.
  2. Batimos azúcar, vainilla y huevo con batidora de varillas hasta que doble su volumen.
  3. Machacamos los plátanos junto con el aceite fundido y lo echamos a la mezcla de huevo.
  4. Incorporamos la mezcla de harina poco a poco mezclando con una espátula.
  5. Echamos 130g del chocolate picado con un cuchillo y volcamos sobre un molde engrasado. Echamos el resto de chocolate por encima.
  6. Horneamos 50 minutos y dejamos enfriar durante 10 minutos. Pasamos a una rejilla.

English version

Let’s be honest: there are recipes you try once… and then they disappear.

And then there are the others. The ones that arrive, sometimes almost by chance, without making too much noise, and end up becoming part of your life forever.

This chocolate cake belongs to that second group.

I remember perfectly the first time I made it. I thought, “well, let’s see how this turns out”… and then something quite common happened when chocolate is involved in this house: it disappeared before it had even completely cooled. And that is always a good sign.

I borrowed the original recipe from @lasrecetasdemj although, by now, you already know I can rarely resist adapting things a little my way. Less sugar, more nutritionally interesting ingredients, and that balance between “delicious dessert” and “something that also makes you feel good”.

Because yes, you can make an incredibly moist chocolate cake without needing half a packet of sugar.

A big part of the secret of this cake is the ripe bananas. They add sweetness, moisture and that tender texture that keeps it perfect for several days… if it manages to survive that long, of course.

And then there’s the chocolate. The kind that melts slightly inside the cake as it bakes, creating little almost-creamy pockets that make every slice different from the last.

The result is intense, moist, aromatic and dangerously addictive… you know how it goes: you start by cutting “just a small piece”… and end up going back to the kitchen a little later for more.

And now I need to know:
are you one of those people who patiently waits for the cake to cool… or do you also burn your fingers trying to grab a warm piece? 😏


Chocolate cake

Ingredients

  • 140 g whole spelt flour
  • 60 g pure cocoa powder
  • 1 1/2 tsp baking powder
  • 1/2 tsp salt
  • 1/2 tsp ground cinnamon
  • 50 g coconut sugar (MJ makes it with 150 g white sugar)
  • 3 ripe bananas
  • 80 g olive oil or coconut oil (I used coconut oil)
  • 1 large egg
  • 1 tsp vanilla extract
  • 180 g dark chocolate, minimum 70%


Method

  1. Preheat the oven to 180ºC and mix the flour, baking powder, cocoa, salt and cinnamon.
  2. Beat the sugar, vanilla and egg with an electric whisk until doubled in volume.
  3. Mash the bananas together with the melted oil and add them to the egg mixture.
  4. Gradually fold in the flour mixture with a spatula.
  5. Add 130 g of the chocolate, chopped with a knife, and pour the batter into a greased tin. Scatter the remaining chocolate on top.
  6. Bake for 50 minutes and leave to cool for 10 minutes. Transfer to a wire rack.


IG

08 abril 2026

Bizcocho de cardamomo y semillas de amapola


Preparar recetas dulces siempre me lleva de vuelta a mis inicios. Y también me recuerda lo mucho que he evolucionado y todo lo que ha cambiado en estos años.

Estar en la cocina sigue siendo mi refugio. Ese lugar donde bajo el ruido, desconecto y vuelvo a mí.
Eso no ha cambiado.

Lo que sí ha cambiado es mi forma de cocinar. Ahora es más consciente, más nutritiva, más enfocada en que lo que preparo no solo esté rico, sino que también siente bien.

Y, sin embargo, hay algo que permanece intacto: mis ganas de experimentar. De probar combinaciones nuevas, de introducir ingredientes que no forman parte de lo habitual y ver qué pasa.

Este bizcocho, aunque sencillo, recoge todo eso.

Mi amor por la repostería.
Mi forma actual de entender la cocina.
Y esa inquietud constante por salir un poco de lo de siempre.

Porque aquí no manda ni la vainilla, ni el chocolate, ni el limón.
Aquí aparece el cardamomo.

Con ese perfume tan especial, ligeramente cítrico, cálido, envolvente… y, de pronto, la cocina huele distinto.

La primera vez que lo preparé no sabía muy bien qué esperar. El cardamomo no es una especia que usemos a diario y quizá por eso tiene algo especial: transforma una receta sencilla en algo inesperado.

Y luego están las semillas de amapola.
Pequeñas, casi invisibles… pero con ese toque crujiente que hace que cada bocado tenga algo más.

El resultado es un bizcocho jugoso, aromático, diferente.
De esos que encajan igual de bien con un café caliente, una tarde tranquila sin prisa o un desayuno en familia un día cualquiera.

¿Y tú?
¿Eres de sabores clásicos… o te gusta salirte un poco de lo habitual?

Cuéntame, que te leo. Y si te animas a prepararlo, etiquétame en Instagram para poder verlo 💛


Bizcocho de cardamomo y semillas de amapola

Ingredientes

  • 200g de mantequilla ecológica
  • 1 y 2/3 tazas de azúcar panela
  • 3 huevos eco
  • 300 ml leche entera ecológica
  • 1 cucharada de cardamomo y otra de semillas de amapola
  • 2 tazas y 1/2 de harina integral de trigo
  • 1 cucharadita de sal y un sobre y medio de levadura química (3 y 1/2 cucharaditas)


Preparación

  1. Fundimos la mantequilla y batimos junto con el azúcar, los huevos y la leche, añadimos los ingredientes secos previamente mezclados (sin las semillas de amapola) y mezclamos con unas varillas manuales o batidora (poco rato).
  2. Añadimos las semillas de amapola y horneamos en el horno precalentado a 180º en dos moldes rectangulares engrasados durante 30-40 minutos.

English version

Making sweet recipes always takes me back to my beginnings. It also reminds me how much I’ve evolved and how much has changed over the years.

Being in the kitchen is still my refuge. That place where I turn down the noise, disconnect, and come back to myself.
That hasn’t changed.

What has changed is the way I cook. Now it’s more conscious, more nourishing, more focused on making sure what I prepare doesn’t just taste good, but also feels good.

And yet, there’s something that remains untouched: my desire to experiment. To try new combinations, to introduce ingredients that aren’t part of the usual routine and see what happens.

This cake, although simple, holds all of that.

My love for baking.
My current way of understanding cooking.
And that constant urge to step a little outside the usual.

Because here, it’s not vanilla, chocolate, or lemon taking the lead.
Here, cardamom steps in.

With that very special fragrance, slightly citrusy, warm, enveloping… and suddenly, the kitchen smells different.

The first time I made it, I didn’t really know what to expect. Cardamom isn’t a spice we use every day, and maybe that’s why it has something special: it transforms a simple recipe into something unexpected.

And then there are the poppy seeds.
Tiny, almost invisible… but with that crunchy touch that gives each bite something extra.

The result is a moist, fragrant, different kind of cake.
The kind that works just as well with a hot coffee, a slow peaceful afternoon, or a family breakfast on an ordinary day.

And you?
Are you into classic flavours… or do you like stepping a little outside the usual?

Tell me, I’m reading you. And if you decide to make it, tag me on Instagram so I can see it 💛


Cardamom and poppy seed cake

Ingredients

  • 200g organic butter
  • 1 and 2/3 cups panela sugar
  • 3 organic eggs
  • 300 ml organic whole milk
  • 1 tablespoon cardamom and another tablespoon of poppy seeds
  • 2 and 1/2 cups whole wheat flour
  • 1 teaspoon salt and one and a half sachets baking powder (3 and 1/2 teaspoons)


Method

  1. Melt the butter and whisk it together with the sugar, eggs and milk. Add the previously mixed dry ingredients (without the poppy seeds) and mix with a hand whisk or mixer (briefly).
  2. Add the poppy seeds and bake in a preheated oven at 180ºC in two greased rectangular tins for 30–40 minutes.


IG

18 marzo 2026

Smoothie de sandía, plátano y remolacha


Hay recetas que nacen en un momento muy concreto de la vida y este batido es una de ellas.

Lo preparaba varios días a la semana durante el embarazo. Era un gesto pequeño, casi automático para ae asegurarme de que mi cuerpo tenía hierro suficiente en esa etapa en la que todo cambia.

Y, sin darme cuenta, se convirtió en uno de esos hábitos que se quedan.

Porque más allá de lo nutritivo —que lo es—, tiene algo que me encanta, aparte de lo fresco y nutritivo que es: un color rosa intenso, imposible de explicar.

La remolacha es la protagonista aquí.
Y si tuerces un poco el gesto al leerlo, espera… no sabe a remolacha.

Se mezcla con la frescura de la sandía, el dulzor del plátano y las fresas, el punto crujiente del apio y ese toque final de menta que lo cambia todo. El resultado es un batido suave, refrescante, con un equilibrio que sorprende.

Y además, tiene algo más.

La remolacha es especialmente interesante para nosotras: ayuda a mejorar la circulación y la oxigenación de los tejidos, aporta hierro y ácido fólico… y también tiene un efecto muy interesante a nivel hormonal. Todo eso tiene un impacto directo en cómo nos sentimos porque mejora la calidad del sueño y con ello nuestra energía y es una gran aliada en etapas como la menopausia, en las que el cuerpo necesita un extra de cuidado y equilibrio.

Y sí, además es una pequeña bomba de nutrientes.
Pero más allá de eso, es de esas recetas que te hacen sentir bien.

Siendo sincera, la mayoría de las veces la preparo “a ojo”, como casi todas las recetas habituales en mi cocina, pero te comparto mi combinación favorita y que más repito.

¿Te animas a probarlo? Aquí puedes ver el paso a paso en vídeo.

Y si la pruebas, cuéntame si eres de las que ya amaban la remolacha… o si es tu primera vez usando este ingrediente en crudo. Te leo 💕


Smoothie de sandía, plátano y remolacha

Ingredientes

  • 1 rodaja de sandía
  • 1/2 plátano congelado
  • 1/2 remolacha cruda pelada
  • 5-6 fresas
  • 250 ml de bebida de almendras sin endulzar
  • 1/2 Manzana
  • 1 tallo de apio sin hojas
  • Un puñado pequeño de hojas de menta


Preparación

  1. Trituramos y servimos al momento!

English version

Some recipes are born at a very specific moment in life, and this smoothie is one of them.

I used to make it several days a week during pregnancy. It was a small gesture, almost automatic, to make sure my body had enough iron during that stage when everything changes.

And without realising it, it became one of those habits that stays with you.

Because beyond how nourishing it is — which it is — it has something else I love, besides being fresh and nutritious: an intense pink colour that’s impossible to explain.

Beetroot is the star here.
And if you pulled a face a little when you read that, wait… it doesn’t taste like beetroot.

It blends with the freshness of watermelon, the sweetness of banana and strawberries, the crisp touch of celery, and that final hint of mint that changes everything. The result is a smooth, refreshing smoothie with a surprisingly balanced flavour.

And on top of that, it has something more.

Beetroot is especially interesting for us: it helps improve circulation and tissue oxygenation, provides iron and folic acid… and it also has a very interesting hormonal effect. All of that has a direct impact on how we feel because it improves sleep quality and therefore our energy, and it’s a great ally during stages such as menopause, when the body needs extra care and balance.

And yes, it’s also a little nutrient bomb.
But beyond that, it’s one of those recipes that simply makes you feel good.

To be honest, most of the time I make it “by eye”, like almost all the regular recipes in my kitchen, but I’m sharing my favourite combination — the one I repeat the most.

Would you like to try it? Here you can watch the step-by-step video.

And if you try it, tell me whether you were already a beetroot lover… or if it’s your first time using this ingredient raw. I’m reading you 💕


Watermelon, banana and beet smoothie

Ingredients

  • 1 slice of watermelon
  • 1/2 frozen banana
  • 1/2 peeled raw beetroot
  • 5–6 strawberries
  • 250 ml unsweetened almond milk
  • 1/2 apple
  • 1 celery stalk, without leaves
  • a small handful of mint leaves


Method

  1. Blend everything and serve straight away!

21 enero 2026

PORRIDGE DE AVENA


Hay mañanas en las que necesito muy poco para ser feliz.
Una taza caliente entre las manos. El vapor que sube despacio. El olor a canela. Y ese primer bocado de algo que reconforta desde dentro.

Las mañanas de sábado son, para mí, eso.
Un momento para volver a lo simple. Para cocinar sin prisa. Y para preparar un desayuno que no solo alimente el cuerpo, sino que lo haga de forma saludable. Que sacie, que me de energía, sin resultar pesado.
Y en esta casa, eso significa: porridge.

Una receta que preparo desde hace años y que nunca falla. Gusta a todos, es sana y nutritiva. Y sobre todo, fácil. De esas que haces sin mirar, porque te la sabes de memoria, pero que nunca deja de sorprenderte lo bien que sienta.

El truco está en cocinarlo a fuego lento, dejar que espese poco a poco y servirlo aún caliente, con tus toppings favoritos. Esos toppings que te hacen sonreír y de los que echas una cucharadita de más cuando nadie mira ;)

Te dejo las cantidades que uso para una persona y así podrás ajustar fácilmente según cuántos seáis o de cuánta hambre tengáis.

Si te animas a prepararlo, cuéntamelo por aquí o en Instagram. Y si encima me compartes qué desayuno logra alegrarte una mañana cualquiera... me encantará leerte.


Porridge de avena

Ingredientes

  • ¼ de taza de copos de avena finos (una medida)
  • Una medida de bebida vegetal (de avena, soja, almendra… la que más te guste)
  • Una medida de agua
  • Una pizca de sal marina
  • Para servir: mantequilla, canela, más leche, fruta, frutos secos… lo que quieras!

Elaboración

  1. Cocemos la avena en el líquido (leche y agua), hasta que espese y tenga textura más gelatinosa (unos 7 minutos a fue medio-bajo).
  2. Servimos y decoramos con lo que queramos ♥️

English version

There are mornings when I need very little to feel happy.

A warm bowl between my hands. Steam slowly rising. The smell of cinnamon. And that first spoonful of something that comforts you from the inside.

Saturday mornings are, for me, exactly that.
A moment to return to simplicity. To cook without rushing. And to prepare a breakfast that not only nourishes the body, but does so in a healthy way. Something filling, energising, without feeling heavy.
And in this house, that means: porridge.

A recipe I’ve been making for years and that never fails. Everyone loves it, it’s healthy and nourishing. And above all, easy. One of those recipes you make almost without thinking because you know it by heart, yet it never stops surprising you with how good it feels.

The trick is to cook it slowly, letting it thicken little by little, and serve it while it’s still warm, with your favourite toppings. The kind of toppings that make you smile and that you add an extra spoonful of when no one’s watching ;)

I’m sharing the quantities I use for one person so you can easily adjust them depending on how many you are or how hungry you feel.

If you feel like making it, tell me here or on Instagram. And if you also share which breakfast has the power to brighten an ordinary morning… I’d absolutely love to read you.


Porridge

Ingredients

  • ¼ cup fine oat flakes (one measure)
  • One measure of plant-based milk (oat, soy, almond… whichever you like most)
  • One measure of water
  • A pinch of sea salt
  • To serve: butter, cinnamon, extra milk, fruit, nuts… whatever you like!

Method

  1. Cook the oats in the liquid (milk and water) until thick and slightly gelatinous in texture (about 7 minutes over medium-low heat).
  2. Serve and top with whatever you like ♥️


Instagram

04 enero 2026

CHOCOLATE PANCAKES


La primera receta de 2026 tenía que ser así: fácil, deliciosa y con olor a desayuno de los buenos.
Y sí… ¡con chocolate!

Estas pancakes de avena, plátano y cacao son suaves, esponjosas, con ese punto de dulzor natural que hace que no necesiten nada más (aunque con sirope de arce, frutos rojos y unos plátanos en rodajas están brutales).

El plátano les aporta dulzor y ternura. Y el cacao… bueno, ya sabes lo que pasa cuando el cacao entra en la cocina: todo mejora.

Las preparo muchas veces los fines de semana, pero esta vez quería que también fueran la primera receta del año. Para que la tengas a mano y puedas sorprender a tu familia el Día de Reyes.

Ese desayuno tiene algo especial. Los niños aún en pijama, abriendo regalos, jugando. Tú con el café calentito entre vuelta y vuelta de las pancakes. Y cuando la cocina empieza a oler a chocolate, te aseguro que no te costará nada reunirlos alrededor de la mesa. Con esa carita de ilusión que da gusto mirar.

Puedes prepararlas en el momento, en apenas unos minutos, o dejar la mezcla lista la noche anterior en la nevera, para que solo tengas que calentar la sartén y empezar a disfrutar.

Y si las haces, cuéntamelo por aquí o en Instagram. Me encantará ver cómo te han quedado y qué toppings les has puesto.

No me quiero despedir sin desearte un Feliz 2026 y darte las gracias por seguir aquí. Ojalá sigamos compartiendo muchas más recetas este año.


Pancakes de avena, plátano y cacao

Ingredientes

  • 120g de harina de avena
  • 3 chdas de cacao en polvo
  • 1 1/4 cucharaditas levadura química
  • 1/2 cucharadita de bicarbonato de sodio
  • 1/2 cucharadita de sal
  • 1 y 1/2 plátano maduro grande, ¡cuanto más maduro, más dulce!
  • 1 taza de leche o bebida vegetal (añádele 1 cucharadita de zumo de limón)
  • 1 huevo grande
  • Mantequilla para engrasar sartén
  • Plátanos para decorar

Elaboración

  1. Machaca el plátano con un tenedor y mezcla con el resto de ingredientes (puedes usar batidora).
  2. Calienta un poco de mantequilla o aceite de coco en una sartén pequeña y añade 1/3 de taza de la masa. Espera a que salgan burbujas y dale la vuelta. Deja unos 2 minutos más.
  3. Sirve com plátano, frutos rojos y un chorrito de sirope de arce

ENGLISH VERSION

The first recipe of 2026 had to be like this: easy, delicious, and smelling like a proper breakfast.
And yes… with chocolate!

These oat, banana, and cocoa pancakes are soft and fluffy, with that naturally sweet touch that means they don’t need anything else (although with maple syrup, berries, and sliced bananas they’re absolutely amazing).

Banana adds sweetness and tenderness. And cocoa… well, you already know what happens when cocoa enters the kitchen: everything gets better.

I make them many weekends, but this time I wanted them to be the first recipe of the year too. So you have it on hand and can surprise your family on Three Kings’ Day.

That breakfast has something special. The kids still in their pyjamas, opening presents, playing. You with a warm coffee between pancake flips. And when the kitchen starts to smell like chocolate, I promise it won’t be hard to gather everyone around the table. With that excited little face that’s such a joy to see.

You can make them right away in just a few minutes, or leave the batter ready in the fridge the night before, so all you have to do is heat the pan and start enjoying.

And if you make them, tell me here or on Instagram. I’d love to see how they turned out and what toppings you chose.

I don’t want to say goodbye without wishing you a Happy 2026 and thanking you for being here. I hope we keep sharing many more recipes this year.


Oat, Banana & Cocoa Pancakes

Ingredients

  • 120 g oat flour
  • 3 tbsp cocoa powder
  • 1 1/4 tsp baking powder
  • 1/2 tsp bicarbonate of soda
  • 1/2 tsp salt
  • 1 1/2 large ripe bananas (the riper, the sweeter!)
  • 1 cup milk or plant-based drink (add 1 tsp lemon juice)
  • 1 large egg
  • Butter to grease the pan
  • Bananas to decorate

Method

  1. Mash the banana with a fork and mix with the rest of the ingredients (you can use a blender).
  2. Heat a little butter or coconut oil in a small frying pan and add 1/3 cup of batter. Wait for bubbles to appear, then flip. Cook for about 2 more minutes.
  3. Serve with banana, berries, and a drizzle of maple syrup.


Instagram

28 diciembre 2025

GINGERBREAD CHRISTMAS COFFEE

Los que amamos el café sabemos que no hay nada comparable al aroma de un buen café recién molido. No hace falta explicarlo: lo reconoces apenas entras por la puerta. Y si además lo mezclas con especias navideñas, canela en rama y un toque de jengibre, lo que tienes entre manos ya no es solo una taza de café… es un momentazo para disfrutar, sola o en compañía. Un respiro entre tanto ajetreo navideño.

Esta receta es perfecta para regalarte una pausa bonita, acompañar ese café de una galleta o un trocito de bizcocho caseros y simplemente sentarte a disfrutar. Nada más, nada menos.

Sírvetelo en tu taza favorita, pon una lista suave de música de invierno y olvídate del reloj unos minutos.
Es diciembre. Estás en casa. Y está bien dedicarte un momento para ti, para disfrutar de la calma y el silencio, aunque sea por un rato.

Aunque es una receta muy fácil, se que os encanta ver cómo se prepara en vídeo y os lo dejo AQUI

¿Eres de las cafeteras como yo o prefieres otro tipo de bebidas calientes? Cuéntame que me encantará conocerte mejor.


Gingerbread Christmas Coffee

Ingredientes

  • 250 ml de leche entera o bebida vegetal
  • ¼ cucharadita de jengibre molido
  • ¼ cucharadita de canela molida
  • 1 rama de canela
  • ½ taza de café recién hecho
  • Nata semi montada (sin azúcar)
  • El endulzante que prefieras
  • Una galleta navideña bonita (opcional, pero muy recomendable)

Elaboración

  1. En un cazo, calienta la leche junto con el jengibre, la canela molida y la rama de canela. Infusiona a fuego suave durante unos minutos, removiendo de vez en cuando.
  2. Mientras tanto, prepara tu café. Si puedes, que sea recién molido.
  3. Mezcla la leche especiada con el café, añade el endulzante que prefieras (o no pongas ninguno) y sirve caliente.
  4. Añade una cucharada generosa de nata semi montada por encima y decora, si quieres, con una galleta navideña.

ENGLISH VERSION

Those of us who love coffee know there’s nothing quite like the aroma of freshly ground coffee. There’s no need to explain it: you recognise it the moment you walk through the door. And if you mix it with Christmas spices, a cinnamon stick and a hint of ginger, what you have in your hands is no longer just a cup of coffee… it’s a proper moment to enjoy, on your own or with company. A little pause in the middle of all the holiday bustle.

This recipe is perfect for treating yourself to a beautiful break, pairing that coffee with a homemade cookie or a slice of cake, and simply sitting down to enjoy it. Nothing more, nothing less.

Serve it in your favourite mug, put on a gentle winter playlist and forget about the clock for a few minutes.
It’s December. You’re home. And it’s okay to give yourself a moment — to enjoy calm and silence, even if it’s just for a while.

Even though it’s a very easy recipe, I know you love seeing how it’s made on video, so I’m leaving it HERE.

Are you a coffee person like me, or do you prefer other hot drinks? Tell me — I’d love to get to know you better.


Gingerbread Christmas Coffee

Ingredients

  • 250 ml whole milk or plant-based milk
  • ¼ tsp ground ginger
  • ¼ tsp ground cinnamon
  • 1 cinnamon stick
  • ½ cup freshly brewed coffee
  • Lightly whipped cream (unsweetened)
  • Sweetener of your choice
  • A pretty Christmas cookie (optional, but highly recommended)

Method

  1. In a small saucepan, heat the milk with the ginger, ground cinnamon and cinnamon stick. Let it infuse over low heat for a few minutes, stirring occasionally.
  2. Meanwhile, make your coffee. If you can, use freshly ground coffee.
  3. Mix the spiced milk with the coffee, add sweetener if you like (or none at all), and serve hot.
  4. Top with a generous spoonful of lightly whipped cream and decorate, if you want, with a Christmas cookie.

14 diciembre 2025

Crepes de harina de garbanzos

Crepes de harina de garbanzo

Después de tantos días de recetas dulces, especiadas y con sabor a Navidad… hoy cambiamos un poco el chip. Porque también hay mañanas en diciembre en las que el cuerpo pide algo salado, saciante y con buena dosis de proteína.

En estos días y, como muchas de vosotras, tengo por delante gestiones infinitas, recados navideños, carreras con los niños, colas para ver a los pajes reales, listas de cosas por hacer… En resumen: días en los que sé que no voy a parar y necesito un desayuno que me ayude a mantener ese ritmo, sin dejarme sin energía a media mañana.

Hoy me he acordado de una de las recetas de mi querida @oh.mamiblue y no he podido resistirme a prepararla. En esta ocasión he acompañado mis crepes de harina de garbanzo con unos espárragos verdes y huevos pasados por agua para incluir una buena dosis de fibra y compensar así los excesos que se avecinan.

También es una receta perfecta para cocinar con los más pequeños: les encanta preparar crepes, se entretienen mientras pasáis tiempo juntos y, además, se acostumbran a probar opciones más saludables y llenas de sabor.

Y como siempre, puedes adaptarla a tu gusto:
– Añade aguacate, tofu marinado o unas setas salteadas.
– Sustituye la sojanesa por hummus o crema de anacardos si prefieres variar.

Como ves, es una receta ideal si hay personas intolerantes al gluten y/o lactosa en casa y queréis compartir un desayuno en familia.

Guárdala, prepárala y cuéntame si te ha gustado.
¿Prefieres los desayunos dulces o salados en estas fechas?


Crepes de harina de garbanzo

Ingredientes

Crepes

  • 1 taza (250 ml) de agua
  • 2 tazas de harina de garbanzos
  • Sal, ajo en polvo, cúrcuma (opcional) y pimienta al gusto
  • Unas gotas de aceite de oliva virgen extra para la sartén

Sojanesa

  • 100 ml de bebida de soja sin azúcar
  • 200 ml de aceite de girasol o de oliva suave
  • 1 cucharada de zumo de limón o vinagre de manzana
  • ½ cucharadita de sal
  • 1 cucharadita de mostaza (opcional)

Elaboración

Crepes

  1. En un bol, mezcla el agua con la harina de garbanzos hasta obtener una masa lisa y sin grumos.
  2. Añade sal, ajo en polvo, cúrcuma si la usas y pimienta al gusto, y mezcla de nuevo hasta integrar.
  3. Calienta una sartén antiadherente a fuego medio con unas gotas de aceite de oliva.
  4. Vierte aproximadamente 1/4 de taza de la masa y mueve la sartén para formar una capa fina.
  5. Deja que se dore por un lado, despega con cuidado los bordes y dale la vuelta para cocinar el otro lado.
  6. Repite el proceso con el resto de la masa. Sirve las crepes con sojanesa y las verduras que más te gusten, o con espárragos verdes y huevos pasados por agua.

Sojanesa

  1. Añade todos los ingredientes al vaso de la batidora en el orden indicado.
  2. Bate con el brazo apoyado en el fondo del vaso, sin moverlo, hasta que emulsione.
  3. Luego sube y baja suavemente el brazo para integrar todo.
  4. Ajusta el sabor si hace falta.
  5. Guárdala en la nevera y úsala durante 4–5 días.

ENGLISH VERSION

After so many days of sweet, spiced, Christmas-flavoured recipes, today we’re switching things up a bit. Because there are also December mornings when your body craves something savoury, filling and with a good dose of protein.

These days, like many of you, I have endless errands ahead of me: Christmas shopping, running around with the kids, queues to see the Three Kings’ pages, to-do lists that never end… In short, days when I know I won’t stop and I need a breakfast that helps me keep up the pace without running out of energy mid-morning.

Today I remembered one of my dear friend @oh.mamiblue’s recipes and couldn’t resist making it. This time, I served my chickpea flour crepes with green asparagus and soft-boiled eggs to add fibre and gently balance out all the festive indulgence.

It’s also a perfect recipe to make with kids: they love preparing crepes, it keeps them entertained while you spend quality time together, and they slowly get used to healthier, flavour-packed options.

And as always, you can adapt it to your taste:
– Add avocado, marinated tofu or sautéed mushrooms.
– Swap the soya mayo for hummus or cashew cream if you prefer.

It’s an ideal recipe if someone at home is intolerant to gluten and/or dairy and you still want to enjoy a cosy family breakfast together.

Save it, make it and let me know if you liked it.
Do you prefer sweet or savoury breakfasts at this time of year?


Chickpea Flour Crepes

Ingredients

Crepes

  • 1 cup (250 ml) water
  • 2 cups chickpea flour
  • Salt, garlic powder, turmeric (optional) and pepper, to taste
  • A few drops of extra virgin olive oil for the pan

Soya Mayo

  • 100 ml unsweetened soy milk
  • 200 ml sunflower oil or mild olive oil
  • 1 tablespoon lemon juice or apple cider vinegar
  • ½ teaspoon salt
  • 1 teaspoon mustard (optional)

Instructions

Crepes

  1. In a bowl, whisk the water and chickpea flour until smooth and lump-free.
  2. Add salt, garlic powder, turmeric if using, and pepper to taste. Mix again until combined.
  3. Heat a non-stick pan over medium heat with a few drops of olive oil.
  4. Pour about 1/4 cup of batter into the pan and swirl to create a thin layer.
  5. Let it brown on one side, gently loosen the edges and flip to cook the other side.
  6. Repeat with the remaining batter. Serve with soya mayo and your favourite vegetables, or with green asparagus and soft-boiled eggs.

Soya Mayo

  1. Add all the ingredients to the blender jug in the order listed.
  2. Place the immersion blender at the bottom and blend without moving it until emulsified.
  3. Then gently move the blender up and down to fully combine.
  4. Adjust seasoning if needed.
  5. Store in the fridge and use within 4–5 days.

Instagram

07 diciembre 2025

GRANOLA DE NAVIDAD

Granola de Navidad

La receta de esta granola es bestial. Yo la hago todo el año muy parecida, pero para darle el toque navideño le añado especias como canela, clavo, anís, cardamomo, semillas de cilantro, nuez moscada y jengibre. Las mezclo un poco a ojo y las voy incorporando a mis recetas.

Porque si algo brilla por su ausencia en estas fechas es el tiempo. Entre comidas, regalos, compromisos varios y los niños en casa, cocinar con calma es casi un lujo. Por eso me gusta anticiparme y tener algunas preparaciones listas para resolver desayunos o meriendas en dos minutos y sin apenas esfuerzo.

Esta granola es una forma fácil y rápida de empezar el día desayunando de forma saludable.
Y lo mejor: los peques pueden prepararse el desayuno solos, cosa que —reconozcámoslo— en vacaciones se agradece muchísimo.

La miel cruda y el aceite de coco ayudan a que quede bien doradita, crujiente y con ese dulzor natural que no empalaga.

Pruébala con yogur, con bebida vegetal, como topping de postres... aunque te aviso: está tan, tan rica que acabaréis comiéndola a puñados, directamente del tarro.

Si en casa no sois muy fans de las especias, no pasa nada. Te dejo también mi receta de granola de chocolate que gusta a todo el mundo.


El paso a paso en vídeo lo tienes AQUÍ.

Se conserva en recipientes herméticos fuera de la nevera durante toda la Navidad (si es que llega… jeje).

Además, si la guardas en un tarro bonito puedes convertirla en un regalo casero perfecto para alguien especial.¿Te animas a prepararla? Si lo haces, por favor, cuéntamelo, que me darás una alegría.


Granola de Navidad

Ingredientes

  • 400 g de copos de avena
  • Un puñado de almendras picadas gruesas
  • Un puñado de avellanas picadas gruesas
  • 1/2 taza de semillas variadas (girasol, calabaza, lino…)
  • Especias navideñas al gusto (canela, clavo, anís, cardamomo, semillas de cilantro, nuez moscada, jengibre…)
  • Un buen puñado de copos de coco deshidratado
  • 80 ml de miel cruda
  • 60 ml (1/4 de taza) de aceite de coco fundido

Elaboración

  1. Precalienta el horno a 170 ºC y prepara una bandeja de horno forrada con papel vegetal.
  2. En un bol grande, mezcla los copos de avena, las almendras y avellanas picadas, las semillas y las especias navideñas.
  3. En otro bol pequeño, mezcla la miel cruda con el aceite de coco fundido hasta que queden bien integrados.
  4. Vierte la mezcla líquida sobre los ingredientes secos y remueve muy bien hasta que todo quede ligeramente humedecido y cubierto.
  5. Extiende la granola en una capa uniforme sobre la bandeja de horno, sin compactarla demasiado.
  6. Hornea a 170 ºC durante unos 15 minutos, removiendo a mitad de tiempo para que se dore de manera uniforme.
  7. Cuando esté doradita y huela a especias y a Navidad, saca la bandeja del horno y deja que la granola se enfríe por completo (se volverá más crujiente al enfriar).
  8. Guarda en tarros herméticos a temperatura ambiente.

ENGLISH VERSION

This Christmas granola is insanely good. I make a similar version all year round, but to give it a festive twist I add spices like cinnamon, cloves, anise, cardamom, coriander seeds, nutmeg and ginger. I mix them more or less by eye and sprinkle them into all sorts of recipes.

At this time of year, the one thing we seem to have less of is time. Between festive meals, gifts, get-togethers and the kids at home, cooking slowly and calmly can feel like a luxury. That’s why I love having a few things ready that make breakfasts and snacks come together in two minutes with almost no effort.

This granola is such an easy and quick way to start the day with a wholesome breakfast.
And the best part: kids can prepare their own breakfast, which —let’s be honest— is very much appreciated during school holidays.

The raw honey and coconut oil help it turn beautifully golden and crunchy, with a natural sweetness that doesn’t overwhelm.

Stored in airtight jars at room temperature, it will keep for the whole festive season (that is, if it lasts that long!).

Enjoy it with yogurt, your favourite plant-based milk, as a topping for desserts… though I should warn you: it’s so good you’ll probably end up eating it by the handful straight from the jar.

If your family isn’t too keen on spices, don’t worry. You can always try my chocolate granola, which is a guaranteed crowd-pleaser.

You can find the step-by-step video HERE.

And if you pour it into a pretty jar, it also makes a perfect homemade gift for someone special.

Will you give it a try? If you do, I’d love to hear how it turned out.


Christmas Granola

Ingredients

  • 400 g rolled oats
  • A handful of roughly chopped almonds
  • A handful of roughly chopped hazelnuts
  • 1/2 cup mixed seeds (sunflower, pumpkin, flax…)
  • Festive spices to taste (cinnamon, cloves, anise, cardamom, coriander seeds, nutmeg, ginger…)
  • A generous handful of unsweetened coconut flakes
  • 80 ml raw honey
  • 60 ml (1/4 cup) melted coconut oil

Instructions

  1. Preheat the oven to 170 ºC and line a baking tray with parchment paper.
  2. In a large bowl, combine the oats, chopped almonds, chopped hazelnuts, mixed seeds and festive spices.
  3. In a small bowl, whisk together the raw honey and melted coconut oil until smooth.
  4. Pour the honey and coconut mixture over the dry ingredients and mix very well until everything is lightly coated.
  5. Spread the granola out in an even layer on the prepared baking tray, without pressing it down too much.
  6. Bake at 170 ºC for about 15 minutes, stirring halfway through so it toasts evenly.
  7. Once it’s golden and your kitchen smells like Christmas, remove from the oven and let the granola cool completely (it will crisp up as it cools).
  8. Store in airtight jars at room temperature.


23 noviembre 2025

Guisantes frescos con huevo poché

Guisantes con huevo poché

Hoy te traigo una receta con muy poco y, sin embargo, lo tiene todo: textura, sabor, contraste… y además, es de esas recetas que te reconcilian con la cocina. No exige tiempo ni técnica, solo ganas de parar un momento, de preparar algo sencillo, incluso de compartirlo con quienes tienes cerca.

19 noviembre 2025

BOL DE DESAYUNO DE CACAO Y PLÁTANO

Bol de desayuno de cacao y plátano

Este bol de desayuno de cacao y plátano es la prueba de que, con muy poquitos ingredientes y en menos de 3 minutos, puedes tener un desayuno saludable, saciante y lleno de sabor (sí, de ese sabor a chocolate que tanto nos gusta...).

19 septiembre 2025

Receta auténtica Hoppers de Sri Lanka

Hoppers de Sri Lanka (appam) con huevo opcional

Hay recetas que te atrapan por el sabor… y otras que se quedan contigo por lo que representan. Esta es ambas cosas. Los hoppers los descubrí en un viaje a Sri Lanka, en uno de esos desayunos sin prisa, en el Rosyth Estate House. Sus dueños, una pareja encantadora (ella nacida en el país y él londinense), se hicieron con esta propiedad, un bungalow de 1926 que hoy han convertido en un refugio en medio de la jungla, con pocas habitaciones, piscina y una cocina local espectacular… ¡sin duda os lo recomiendo si viajáis al país! Allí fue donde probé los hoppers por primera vez y donde aprendí la receta. Fue amor al primer bocado.

Me fascinó la textura crujiente en los bordes, el centro tierno y ese sabor tan especial a fermentación suave, leche de coco y arroz. Desde entonces, forman parte de mis mañanas cuando necesito empezar el día con fuerza y energía. Y si estás transitando la perimenopausia o la menopausia, incluir proteína en el desayuno es clave para la saciedad, la energía y el mantenimiento de la masa muscular.

24 octubre 2024

Gofres saludables para un desayuno o merienda diferentes


¿Lista para preparar una receta saludable y deliciosa? ✨🌱 Hoy os traigo una receta facilísima para hacer unos gofres (o pancakes o lo que prefieras 😉) con harina de avena y aceite de oliva virgen extra. ¡Perfectos para un desayuno distinto o una merienda rápida!

03 abril 2019

Granola Carrot Cake

La semana pasada compartía con vosotros en mis stories y en instagram, esta receta de mis queridas amigas Sara y Ani de granola carrot cake. No os asustéis por el nombre, que no es un pastel, ni lleva azúcar, ni mantequilla, jeje, simplemente es una granola casera con "sabor" a carrot cake, o mejor dicho,  con el ingrediente principal de éste, la zanahoria. Dicho en otras palabras, estamos hablando de una receta de granola de zanahoria.

04 octubre 2018

Receta de granola de chocolate


|ENGLISH recipe below| A veces pienso que quien no come sano es porque no quiere, directamente, no es que no se tenga tiempo, porque por más que éste vuele, no me váis a negar que no podéis sacar 10 minutos para preparar esta granola casera de chocolate que os puede salvar más de una mañana de prisas.

Solo necesitas 5 minutos y un ratito de horno, y esta granola se conserva perfectamente durante un mes en un recipiente hermético en tu despensa así que vaciladas las justas y vamos a por ella.
Siempre me ha gustado desayunar salado, era de las de bocadillo, pan con tomate y embutido, pero confieso que desde que en casa no entra la carne, mis desayunos son otros). Pancakes sin azúcar, endulzados con frutas naturales, pudding de chia, batidos...

Ésta es una de mis recetas de granola preferidas, la llevo preparando desde que la descubrí en el libro de Green Kitchen Stories hace unos meses y suele ser uno de los indispensables en nuestra despensa.

05 julio 2018

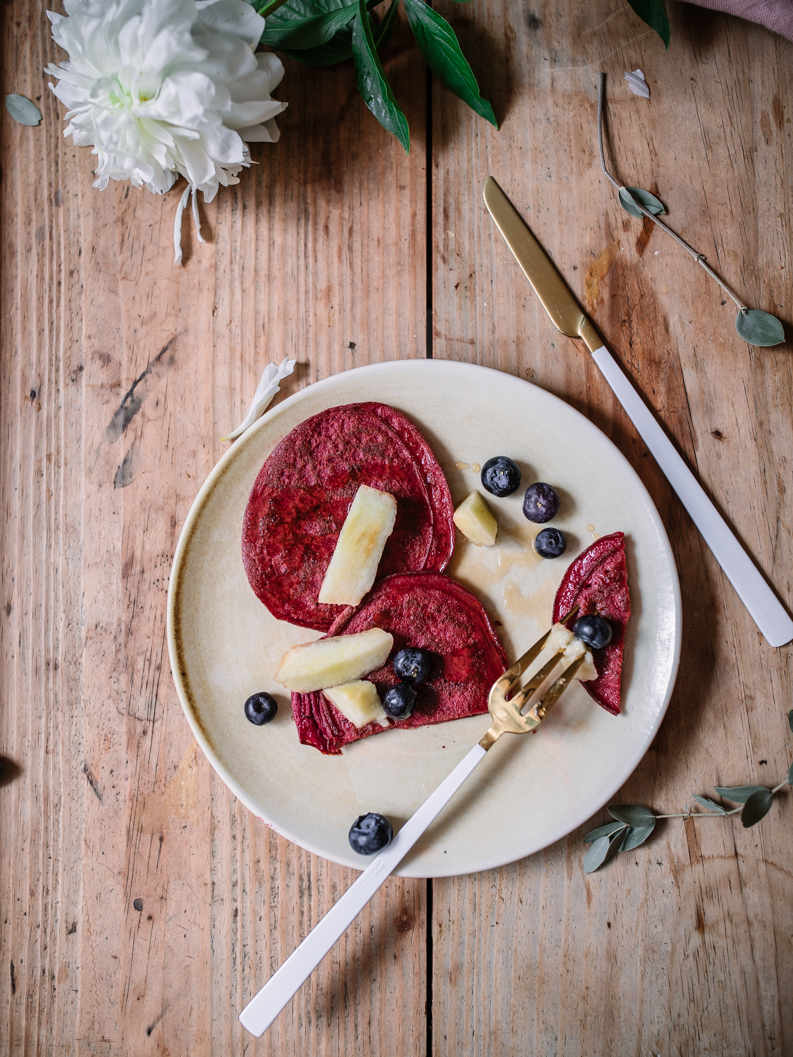
Pancakes de remolacha

Todo va de la mano, la alimentación y el deporte, siempre ha sido así. Aunque la alimentación, a la hora de nuestro aspecto físico ocupa un 80% (sí, así es, por más deporte que hagamos, si no comemos bien y cuidamos la alimentación, posiblemente no estemos tan en forma como queramos), cuando estás embarazada se podría decir que esto va al revés o al menos de la mano, el deporte y el ejercicio y preparación física cuando quieres tener un parto natural (ectópico, vaginal) es de suma importancia.

Aparte de compartir con vosotros la receta de pancakes de remolacha que ya os dejé en mi cuenta de instagram hace unos días) y tenéis al final de este post, hoy os hablo más a fondo de lo que es mi gran descubrimiento durante este embarazo, el método AIPAP de preparación al parto en el agua en el centro Pengüins de Barcelona.

27 febrero 2018

Pudding de chia y nuestro viaje en familia a la nieve en Font-Romeu


Parece que este año el invierno vuelve a llegar con retraso, pero qué maravilla de paisajes nos está dejando... Aunque soy una persona de calor y poco tolerante al frío, no hay nada que me guste más que la nive. Ver nevar. La nieve es paz. Así que cuando puedo suelo escaparme a las montañas, que por suerte tengo muy cerquita de Barcelona. Hace unas semanas decidimos explorar la zona de Font-Romeu, una estación de esquí a la que mis padres me habían llevado de pequeñita para aprender a esquiar y que me hacía especial ilusión ir con mis hijos. Después de la receta de pudding de chia os cuento todos los planes que se pueden hacer en una escapada de esquí a Font-Romeu en familia.


02 diciembre 2016

Pancakes de avena


Hace tiempo que quería compartir con vosotros uno de mis desayunos estrella, que además es sin gluten y apto para vegetarianos. Esta receta de pancakes de avena con mermelada de fresas y semillas chia se va a convertir en vuestro fetiche del desayuno healthy, tomad nota.

Recuerdo cuando iba al campamento de verano en Estados Unidos, cual Tú a Boston y yo a California, los días que había pancakes para desayunar, ya se olía a canela, pasas, bacon y huevos desde la cabaña. Creo que es de los olores que recuerdo con mayor nostalgia.

Esos pancakes, seguramente estaban hechos a base de un preparado prefabricado con ingredientes ultra refinados, con aceites hidrogenados, azúcar, etc… solo hay que ver el contenido de los ingredientes en los paquetes de los pancakes.